




Control Resonant Unsupervised Science Walkthrough: All Testing Facilities
 Steam
Steam Xbox
Xbox PlayStation
Unsupervised Science asks you to shut down every experiment left running under Manhattan, and its main obstacle is not difficulty but geography. The facilities get marked on your map once you find the coordinates, but the marker points at a patch of open street, because the facilities are underground and their entrances are not marked at all. Below are all six entrances, both puzzle types, and the Threshold that closes the quest.
Unsupervised Science Quest Overview
Type | Side Story |
Zones | Downtown, Central, Evacuation Zone, West Incursion Zone, The Park, the Unknown |
Facilities | Six, one per zone |
How to start | Find any testing facility |
Trophy | Threshold Researcher |
Rewards | Power Upgrades, accessories, Untapped Scrunchie recipe |
The full campaign order across all three quest chains sits in the Control Resonant Walkthrough Hub.
There is no facility in the Underpass. Six zones out of seven have one, which is the first thing people check when a completion count sticks.
How the Testing Facilities Work

One of the facilities holds a note with the coordinates of all the others, which puts them on your map. That note is the Testing Facility Coordinates file, found in the Evacuation Zone facility, so clearing that one early saves you a lot of searching.
Marked or not, you still have to find the way in. Every facility is underground and every entrance is unmarked, usually a hatch or a stairwell near a construction site or a sewer.
Two puzzles repeat across the six sites.
The Soda Dispenser puzzle appears in Downtown, the Evacuation Zone and the West Incursion Zone. The Power Core balancing puzzle appears in Central, The Park and the Unknown, with the Unknown adding an extra core. Learn one of each and the other four are repeats.
How to Solve the Soda Dispenser Puzzle

A note on the terminal tells you the default state is Soda Dispenser.
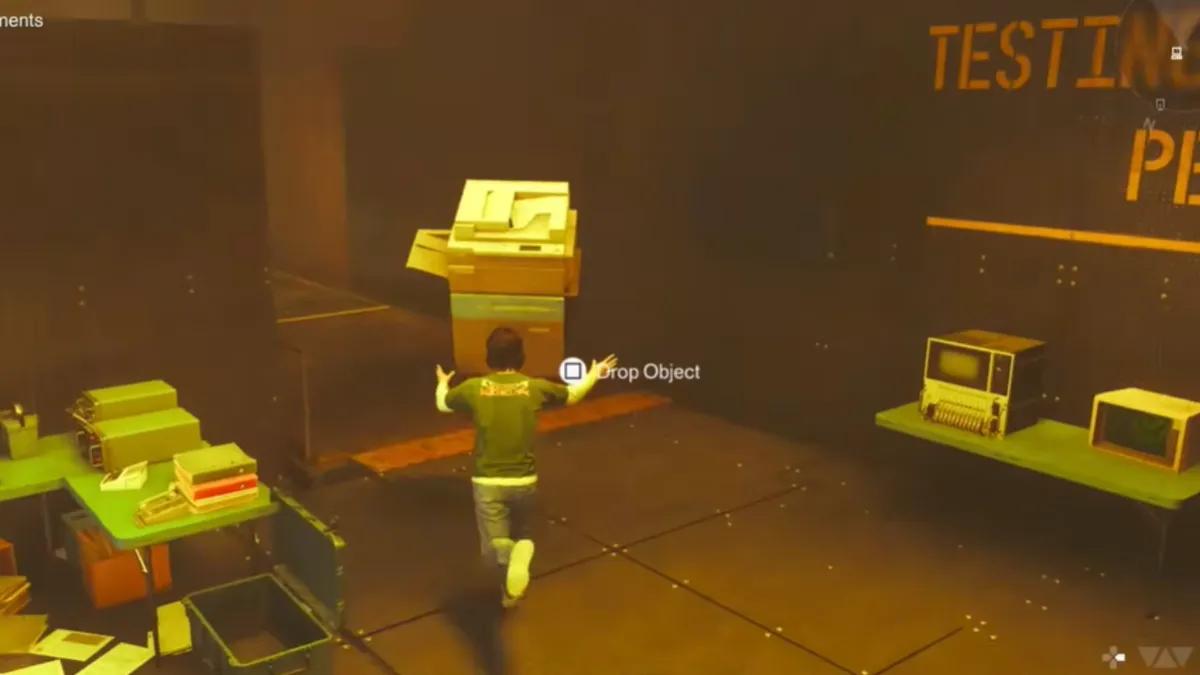
The room holds several objects you can pick up, carry to the centre, and place inside a box. The catch is that the object has to be a Soda Dispenser at the moment you place it.

Changing an object's state is done by passing it through the yellow lines in the room. Every crossing turns it into something else, and the order of the transformations is drawn on the whiteboard above the terminal next to the note.
That whiteboard order is what makes the puzzle feel slow, because the obvious approach is to cycle an object through the full sequence until it comes back around.
The faster method is to break the sequence. Carry an object across one line, then jump over to the side where it turns into a different one, so the transformations stop following the drawn order. This can land you on Soda Dispenser several steps earlier than cycling would.
A practical extension: once you have a Soda Dispenser, look for a box within the same set of lines rather than carrying it across the room, since crossing another line undoes your work.
How to Solve the Power Core Puzzle

The shutdown sequence in these facilities runs for 60 seconds, and your job is to keep the room's power balanced for the whole duration.
There are four Power Cores in the room, two of them charged. Once you start the process, watch the red lights on the dead cores. When one begins blinking, take a charge from a charged core and carry it over.

Keep doing that for the full 60 seconds and the gate opens.

The Unknown facility runs the same puzzle with five Power Cores instead of four, which tightens the routing but does not change the method.
All Testing Facility Locations
Downtown

The entrance is inside the Testing Facility Reade building in the east of the zone. The building is under construction, and there are Hiss inside to clear before you can look around properly. The underground entrance is in there once the room is safe.
Puzzle: Soda Dispenser.
Rewards: Power Upgrade, A Note From Dr. Milbeck's Cardiologist.
Central

The entrance is east of the Patterned Factory, where you fight the Deserter. Look for the construction site and the underground entrance near it.
Puzzle: Power Core balancing.
Rewards: Power Upgrade, Notes From Dr. Puchalski.
Evacuation Zone

The entrance is right next to the Survivalist's Bunker fast travel point in the south of the zone, which you will already know if you have done Control Resonant Urban Survival Walkthrough.

Puzzle: Soda Dispenser.
Rewards: Power Upgrade, Testing Facility Coordinates. This is the note that marks every other facility, so do this one first if you can.
West Incursion Zone

The entrance is south of the House of Mirrors, in the second lane from the bottom of the map.
Puzzle: Soda Dispenser.
Rewards: Power Upgrade, Notes From Dr. Janson.
The Park

The facility is in the northeast of the zone, with two sewer entrances leading to it. If you have progressed far enough to have Control Resonant New Growth Walkthrough active, you end up down here for that quest anyway, so the two combine neatly.
Puzzle: Power Core balancing.
Rewards: Emergency Hood accessory, Notes From Dr. Roth.
The Unknown

The last facility is inside the Unknown, near the middle, west of the fast travel point on the map.

Puzzle: Power Core balancing with five cores.

Rewards: Firebreaker Goggles accessory, Notes From Dr. Grant.
How to Complete the Threshold in the Unknown

Shutting down the sixth facility opens a Threshold inside it, right next to the room where you picked up the accessory. This is the actual end of the quest, and it is why a completion count of six facilities does not pop the trophy on its own.
Inside the Threshold:
Go straight until you see two names written on the floor. Janson is written to the left and Puchalski is straight ahead. Both are traps: going left turns Dylan into a chair, and going straight turns him into a telephone booth.
Go right instead. Hit the board at the end of that path.
Then take the left path to collect an electric charge from the Power Core.
Return to the straight path. When it splits, go left and use the charge on the dead Power Core there. Grab the materials inside the room.
Come back to the split and go straight this time. There is a corpse at the end. Interact with it to complete the quest.
Unsupervised Science Rewards

Finishing the Threshold awards Dr. Grant's Final Report, the Untapped Scrunchie Artifact recipe, and the Threshold Researcher trophy.
Along the way, four facilities pay out a Power Upgrade each and two pay out accessories. Power Upgrades come in threes, so the four you collect here cover more than a full upgrade to your Power pool, which directly increases how often you can use Combat Abilities.
The Scrunchie arrives as a recipe and has to be crafted at the Artifact Formation before you can equip it.
Common Mistakes
Searching for an Underpass facility. There isn't one. Six zones have them, the Underpass does not.
Standing on the map marker looking for a door. The markers show the facility, which is underground. The entrance is elsewhere nearby and unmarked: check construction sites and sewers.
Doing the Evacuation Zone facility last. It holds the coordinates note that marks all the others.
Cycling objects through the full whiteboard order. Breaking the sequence by jumping sides is faster than following it.
Stopping at six facilities. The trophy comes from the Threshold that opens afterward in the Unknown, not from the shutdowns themselves.
Taking the named paths in the Threshold. Janson and Puchalski both turn you into furniture. Go right.
What to Do Next
The facilities span six zones, which makes this a good quest to leave running in the background. Control Resonant Notes: Every Dog Has Her Day Walkthrough works the same way across seven zones and pairs with it well.
If you are in The Park for the sewer facility, Control Resonant New Growth Walkthrough uses the same tunnels and is the larger quest of the two.


 Successfully copied... Thank you for sharing our content!:



5% deposit bonus up to 100 gems

a free Gift Case





EGAMERSW - get 11% Deposit Bonus + Bonus Wheel free spin


EXTRA 10% DEPOSIT BONUS + free 2 spins

3 Free Cases + 100% up to 100 Coins on First Deposit


5 Free Cases, Daily FREE & Welcome Bonuses up to 35%

3 free cases and a 5% bonus added to all cash deposits.

+5% to deposit




Comments