




Control Resonant Freeze Frame Walkthrough: Every Camera Location
 PlayStation
 Xbox
Xbox Steam
SteamFreeze Frame can start inside your first hour of Control Resonant and will not finish anywhere near that fast. An Altered camera teleports between zones, freezing Dylan in place whenever it catches him, and the only guidance you get is a set of photographs showing what the lens is pointed at. Reading those landmarks is the whole quest.
Freeze Frame Quest Overview
Type | Side Story |
Zones | Central, Evacuation Zone, West Incursion Zone |
Requirement | None to start, though one Central camera is easier with Reach |
How to start | Walk into a camera, or find a pair of photographs |
Rewards | Not documented in the material available here |
The full campaign order across all three quest chains sits in the Control Resonant Walkthrough Hub. Freeze Frame is one of the five side quests tied to the Panopticon Intern trophy, alongside Control Resonant Panopticon Service Request Walkthrough and Control Resonant The Party Won't Stop Walkthrough.
How to Start Freeze Frame

There are two entry points. The first is walking into the camera itself somewhere in the world, which freezes you for a few seconds and then vanishes. The second is finding the photographs, which come in pairs and are confirmed in three zones: Central, the Evacuation Zone and the West Incursion Zone.
Each photo shows the view directly in front of the camera, which always looks out at something recognisable. You match the landmark to a place you have been, go there, and then solve a short traversal problem to get behind the lens. Closing the shutter from behind is what completes that camera and sends it elsewhere.
Because the quest runs entirely on landmark recognition, unlocking all Map Kits before you start saves an enormous amount of wandering. Each zone hides a Mapping Pylon and three Sensors, and turning them on fills in the points of interest the photographs are pointed at. A camera photo of a parking structure means nothing on a blank map and is obvious on a filled one.
Where to Find the Photographs in Central

Both Central photos are inside the FBC Field Office. Head to the back of the building, past the planning table where you picked up the Level 1 security keycard during Control Resonant Welcome to Manhattan Walkthrough. They sit on a desk on the right, next to a brown pillar, a plant and a bank of camera rolls.
How to reach the first camera in Central

The first camera is in the Watchtower, in the same building where Zoe gave you your opening assignment.
From her office overlook, turn left to face east and make your way down to the bottom of the staircase. At the bottom, head west toward the room lit dark orange and follow the path around until you have to jump up some scaffolding. The camera is usually waiting there, and it will freeze you before disappearing.
Getting behind it is simple once you know the route. Return to the bottom of the scaffolding to make the camera reappear if it has gone, then climb back to its level and look above the scaffolding for a hole in the ceiling.
Double jump through the hole and follow the upper path south until you reach another set of deep orange lights. Drop down from there and you will land behind the camera. Walk up and interact with it to close the shutter.
How to reach the camera across from the City That Never Stops sign

There are two routes to this one.
With Reach, the traversal ability from the Fault in the Evacuation Zone, there is a grapple point on the south side of the parking structure.
Without it, you go through the parking lot on foot. The ground entrance is on the west side, near the path toward the West Incursion Zone checkpoint. From the central plaza, head southeast and look for a blue semi truck parked beside a brick building with an Available sign on it. Turn south from the truck for the rear entrance.
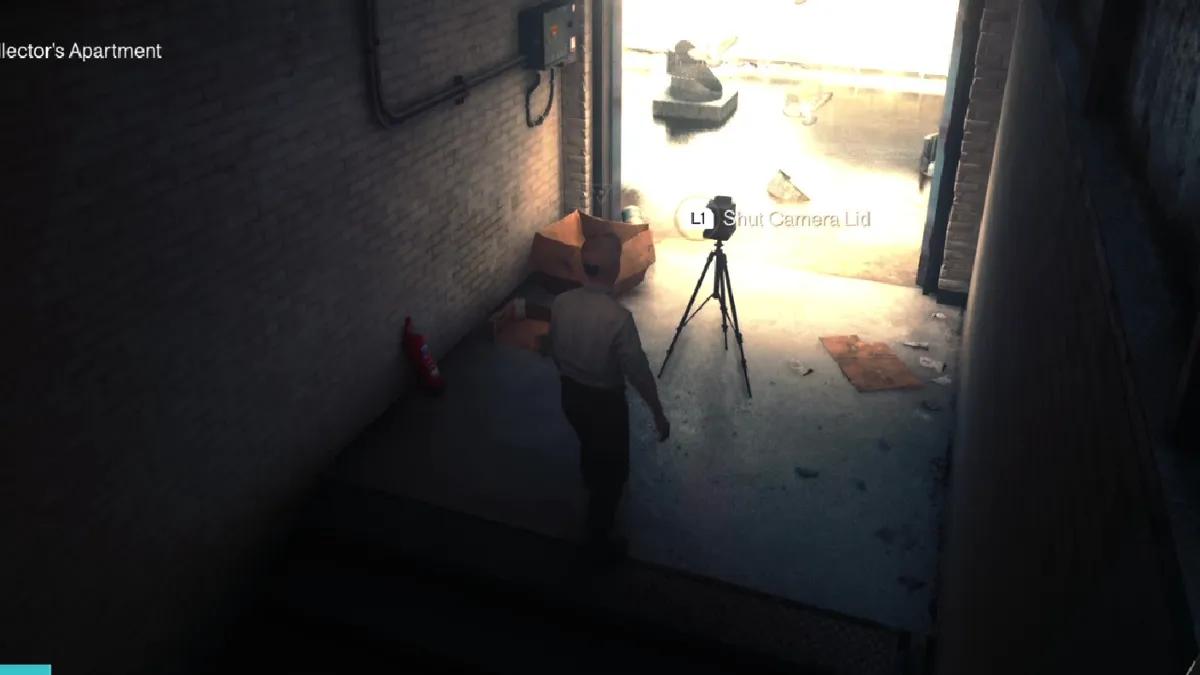
Fight your way up, clearing each floor as you go. When you reach daylight, clear the Hiss off the rooftop and look north across the street. The camera sits inside an open doorway.

Jump across and let it freeze you, which is intentional here: the freeze is what gives you time to use the staircase behind it and get into the warehouse. Wait for the camera to reappear, head back up the staircase, and close the shutter from behind.
Where to Find the Photographs in the Evacuation Zone

The Evacuation Zone photos are in the eastern section of the area, the part you cross while investigating the tremors during Control Resonant Evacuation Procedures Walkthrough.
In front of the building spewing red light are two raised orange portable offices. Go into the western one. The first card is on the standing printer and the second is on the back-left table.
How to reach the camera facing the wall

One photo shows the camera pointed at a low wall with a sign reading Fired over nothing barely visible behind it.
This one is a charge relay rather than a platforming puzzle. You need to carry electricity from the Power Core Station near the portable offices all the way west to the door behind the camera, in the western part of the Zone. The closest map marker is the one labelled Unauthorized mines.
Attack a power core to load the charge onto the Aberrant, then head a short way west. Platform up onto the roof of the building on the south side of the road, where there is another Power Core. Deposit the charge there to reset its timer, then hit the core again to take it back.
Drop to street level and continue west. There is a core on your left before you reach the double doors. Bank and reclaim the charge there as before.
Keep west through the double doors, past the parking lot on your left, until you reach a pair of unpowered elevators. Bank the charge again.
The last leg is the tightest. Grab the charge, run west to the end of the road, use the parked semi truck for height, and jump onto the platform on the south side. From there, jump across to the lower rooftop on the other side of the street and deposit the charge next to the door, which unlocks it. Then close the shutter.
How to reach the camera facing construction

The second Evacuation Zone camera is in the far north of the region, near Railyard Street Station. You are looking for a building south of the station, on the southeast corner across from the construction site. There is a large amount of blue mold growing near the approach.
Let the camera see you, which opens the way into the building behind it. Head to the bottom floor and activate the elevator, then leave the building briefly so the camera reappears. Ride back up to the rooftop door and close the shutter from behind it.
A Note on Coverage
The material available for this walkthrough documents the Central and Evacuation Zone photographs and four cameras in total. The West Incursion Zone photos are confirmed to exist but their location is not recorded here, and no reward is listed for completing the quest. Treat the two zones above as covered and the rest as open.
Common Mistakes
Trying to close the shutter from the front. The interaction only works from behind the camera. Everything about each puzzle exists to get you around it.
Waiting for the camera to come back where you stand. It reappears at its post, not at you. Walk back to the spot that triggered it.
Dropping the charge on the Evacuation Zone relay. Bank at every core along the route rather than trying to make the run in one go.
What to Do Next
Freeze Frame is one of five side quests behind the Panopticon Intern trophy, so if you are chasing it, Control Resonant The Party Won't Stop Walkthrough and Control Resonant Panopticon Service Request Walkthrough are the next two to clear. Control Resonant The Last Taxi Walkthrough covers the other early Altered-object hunt, which spans the same zones and is easier to finish in one sitting.


 Successfully copied... Thank you for sharing our content!:



5% deposit bonus up to 100 gems

a free Gift Case





EGAMERSW - get 11% Deposit Bonus + Bonus Wheel free spin


EXTRA 10% DEPOSIT BONUS + free 2 spins

3 Free Cases + 100% up to 100 Coins on First Deposit


5 Free Cases, Daily FREE & Welcome Bonuses up to 35%

3 free cases and a 5% bonus added to all cash deposits.

+5% to deposit




Comments