


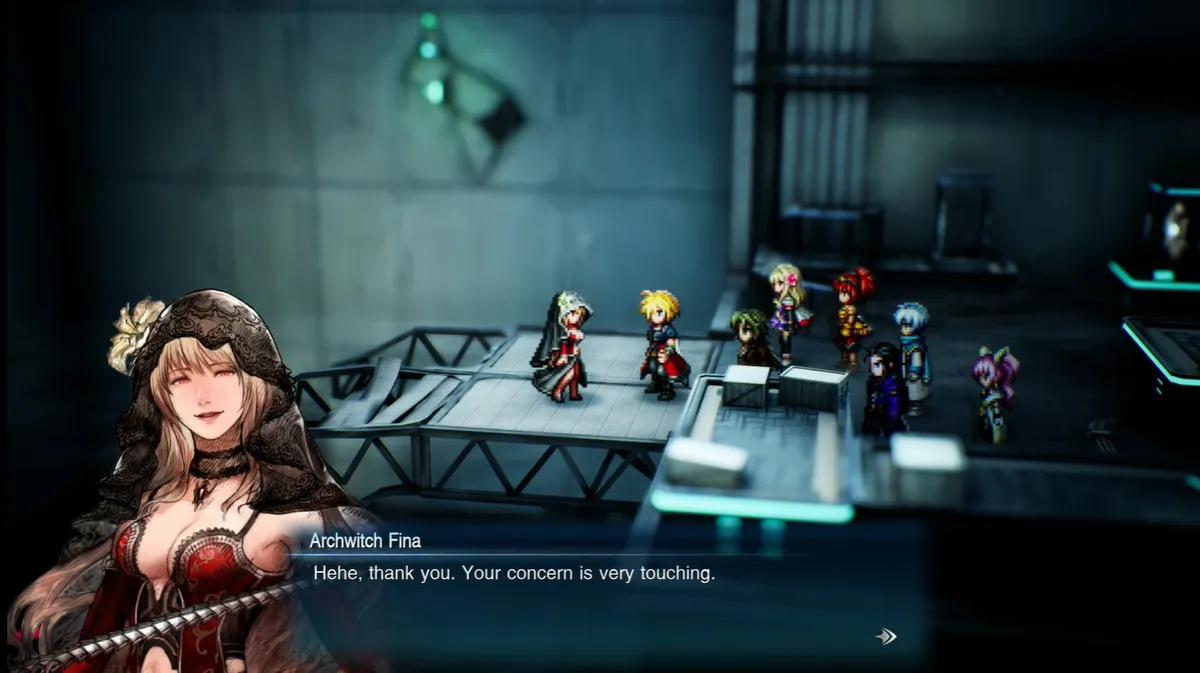
Final Fantasy Resonance Chapter 6 Walkthrough: Holy, the Sanctissimus Trials and Gelidus
 Square Enix
 Fantasy
Chapter 6 is the most gated chapter in Final Fantasy Resonance. An entire region sits behind a spell that one character has to be taught, the laboratory in front of that spell runs on three tiers of security clearance, and the shrine at the end refuses to open until two party members have fought each other properly. None of it can be brute-forced, which is unusual for this game.
Tranquility Quest Overview
Chapter 6 runs from the Enterprise landing outside Gronoa to the party losing track of the Dark Crystal entirely. Mysidia, the Arcane Library and Fina's psyche are in Final Fantasy Resonance Walkthrough: Chapter 5.
Chapter | Chapter 6: Tranquility |
Starting location | Gronoa, on foot after the Enterprise lands |
Main objectives | Learn Holy, cross the Bog of No Return, clear Sanctissimus Shrine |
Bosses | Six shrine trials, the Rain and Lasswell duel, Gelidus |
Key item | White Jade Stone, for Fina's Holy training |
Title earned | Paladin |
Ends with | The Dark Crystal displaced and its location unknown |
The route is linear and the gates are not. Holy is a story unlock rather than a purchase, the laboratory teleporter stays dead until you operate a control panel, and the shrine's inner chamber opens only after the duel.
That combination catches people out in a specific way. Each gate looks like a navigation problem the first time you hit it, which sends players back through areas they have already cleared looking for a route that does not exist. If something will not open in this chapter, the answer is almost always a story step you have not done rather than a door you have not found. The chapter list sits in the Final Fantasy Resonance Walkthrough: All Chapters hub.
Gaberads, the Undertown and Why the Bog Blocks You

The Enterprise cannot fly any deeper into Gronoa. Sakura explains that breathing too much of the miasma hanging over the region is dangerous, so the group lands and continues along the available ground route.
That route leads to Gaberads, the Undertown, a settlement built below ground specifically so its residents do not have to breathe the air above it.
Speak to the residents until one of them explains why nobody simply walks across the surrounding marsh.
The obstacle is the Bog of No Return, an area saturated with miasma, and the important thing to understand early is that ordinary exploration will not get you across it. Finding the correct path toward the shrine changes nothing, because the bog is not a maze and the miasma is not a hazard you can route around.
This is the first of the chapter's three gates, and the one most likely to send you walking in circles if you try it before the story is ready.
The elder in Gaberads has the answer. The party needs Holy, an ancient spell with enough power behind it to overcome the miasma outright, and Fina is the only member of the group with the potential to learn it.
What the elder needs before she will start the training is a specific material. A White Jade Stone, kept in ruins east of Gaberads, and she will not begin without it.
Do not go to the bog yet. The objective at this point is the stone, the training comes after it, and nothing in the region moves until both are done.
How to Get Through the Research Center Ruins

Leave Gaberads and travel east to the Research Center Ruins.
Sakura identifies the building on sight as an ancient Aldorian research laboratory.
Like the land around it, the facility was transported here from Palladia centuries ago, which makes it the second time in two chapters that the story has produced a piece of another world sitting in the middle of this one. After the memory sequences in Chapter 5, the party has enough context to know what that means rather than treating it as a curiosity.
The White Jade Stone is deep inside, and the laboratory runs on three tiers of Lab Key Cards, locked doors and a teleporter that is not working when you arrive.
The structure of the facility is worth understanding before you walk into it, because the layout sends you back and forth rather than forward.
Start by collecting the Level 1 Lab Key Card in the entrance area, then return to the main junction. Two doors face you there. The one on the left reads a Level 1 security card and opens, and the one on the right demands Level 2 clearance and will not, so the left door is the only route available at this stage.
Follow the Level 1 section into the laboratory and look for the machinery controlling the teleportation system.
Operate that control mechanism. It is a single interaction in a room full of equipment, it is easy to walk past, and it is the single most common reason people stall in this dungeon. The central teleporter stays dead until it is switched on, and a dead teleporter looks exactly like a dungeon you have not finished exploring.
If the teleporter is not working, the problem is the laboratory controls rather than a route you have not found yet.
With the teleporter live, keep exploring the connected rooms to pick up the Level 2 Lab Key Card, which opens the sections that were restricted earlier, and work through those to reach the Level 3 Lab Key Card.
The progression in order:
- Level 1 Lab Key Card opens the left-side door from the entrance junction
- Activate the central teleporter to restore access to the next part of the laboratory
- Level 2 Lab Key Card opens the Level 2 security doors
- Level 3 Lab Key Card allows further exploration of the restricted facility
Past the Level 3 doors, continue through to the chamber holding the stone.
It is not hidden and there is no puzzle attached to it. The stone has a distinctive pale glow that matches how the elder described it, and interacting with it collects the White Jade Stone. The objective immediately changes from exploring the laboratory to getting back to Gaberads.
On the way out, the party runs into Elfried, one of the Eight Sages of Hess, who has also come out of a crystal.
He is nothing like the man seen inside Fina's memories in the previous chapter. Centuries sealed away have left him consumed by a single goal, which is breaking the remaining crystals and freeing his former comrades, and he does not appear to care what that costs anyone standing nearby.
Complete the encounter and leave. There is no second training material hidden in the laboratory and no reason to keep searching it.
Fina's Holy Training and Crossing the Bog of No Return

Return to Gaberads and speak to the elder. She accepts the White Jade Stone and agrees to train Fina.
The training runs through the night. The rest of the party takes the opportunity to rest, while Lasswell spends it practising his swordsmanship instead, which looks like a character beat and is actually setup for the trial at the end of the chapter.
Once the story advances, go back to the elder and collect Fina. She confirms that the training worked and that Fina has learned Holy.
That is the progression condition for the miasma in full. There is no separate Holy spell item sold anywhere, no spellbook to find and no alternative route that skips it.
Travel back to the bog outside Gaberads.
When the party reaches the affected area, the characters themselves recognise that Holy should now be enough to get them through. Fina casts it during the story sequence rather than as something you select from a menu, so there is nothing to time and nothing to aim. The miasma blocking the route disperses and the way west opens.
If you walked to the bog earlier and could not continue, the missing requirement was always the elder's training. You also do not need to keep casting Holy in ordinary battles to keep the path clear. The roadblock is removed once, as part of the encounter.
With the bog behind you, head west. Sakura explains that the Dark Crystal is kept in Gronoa Shrine, on the far side of a rough mountain route.
Rugged Mountain Path, Duggle and What You Learn About Raegen

Work west through Rugged Mountain Path. This is the land route to the shrine, so fight through its encounters and follow the passages available rather than going back to the Enterprise to look for a way to fly over it. There is no aerial shortcut.
Two things develop along the way.
The first is the growing friction between Rain and Lasswell.
Lasswell has been training with increasing intensity since Zoldaad and is frustrated that Rain does not seem to register how seriously he takes their rivalry. From Rain's side it reads as Lasswell being hard on himself over nothing. From Lasswell's side it reads as years of work being waved off.
That disagreement is not scenery and it does not resolve on its own. The shrine at the end of the chapter puts a trial in front of the party that cannot be cleared until both of them deal with it.
The second is the Sworn Six, who the party runs into again on the mountain.
The story that comes out of those encounters fills in a great deal about Raegen, Lux and Sophia, including the circumstances around the death of Rain's mother. After five chapters of the Sworn Six being an obstacle with a stated grievance, this is where the grievance starts getting specific.
None of it branches. There is no route choice hidden in these scenes, so continue toward Gronoa Shrine once the encounters finish.
Before the shrine, the party reaches the Town of Duggle and takes shelter there from contaminated rain falling over the region.
Treat it as the staging post it is rather than a scene to click through. Restore HP and MP, check which abilities everyone has equipped, and set the party up properly, because what follows is a shrine, a boss and then a second shrine built entirely out of consecutive fights.
What Duggle is not is a change of objective. The Dark Crystal has not been recovered and the destination is still Gronoa Shrine.
Gronoa Shrine and Why the Dark Crystal Is Missing

Inside the shrine, the party finds evidence that the Sworn Six and the surviving Sages have already started moving on the Dark Crystal, which means this stops being a search and becomes a race partway through.
Follow the interior route, descending through the chambers and down the ladders toward where the crystal is supposed to be kept.
Elfried is waiting, and his long imprisonment has left him fixated on breaking the final seal at any cost. During the confrontation his power turns unstable and he tries to release what he has left, which would take the surrounding area with it. Lux steps in and keeps Rain's group out of the blast.
When the party finally reaches the crystal's location, it is empty.
That is worth stating plainly, because the layout invites second-guessing. The crystal is not behind a different staircase and there is no hidden room holding it. Gelidus moved it, and he moved it to Sanctissimus Shrine. His stated reason is that the party will understand what he intends if they are strong enough to reach him.
Sakura places Sanctissimus Shrine south of the current area. Leave Gronoa Shrine and head there, and bring the party out of Duggle in better shape than you would for an ordinary dungeon, because the next location is a run of back-to-back boss encounters with no shop attached.
The First Three Sanctissimus Shrine Trials

Sanctissimus Shrine is built as a sequence of combat challenges. Sakura explains that warriors who get through them and reach the inner chamber can be awarded the title of Paladin.
The route does not open by clearing the ordinary enemies between rooms. Several encounters are introduced by stone inscriptions, and each inscription describes the mechanic the fight is testing. Read every stele before starting its battle. The wording is the hint, and it is the only one you get.
Trial 1 warns of an ever-shifting foe and instructs you to strike at its weakness rather than attacking blindly.
Use Libra, or simply watch the damage feedback, to work out what is actually effective, then prioritise whatever triggers the Weak indicator. The habit the trial is drilling is reacting to change. If an attack that was working suddenly stops, check the enemy's current condition before repeating it a third time, because the weakness has moved rather than disappeared.
Trial 2 is Dad Bomb, a Level 40 Demon with 84,000 HP. Its Libra entry warns that it self-destructs when its HP is lowered, which inverts the usual logic. The danger comes from damaging it rather than from surviving a telegraphed heavy attack.
Keep enough damage in reserve to finish Dad Bomb quickly once its health starts dropping, rather than grinding it down in small increments and hoping.
If you cannot close it out in one push, hold defensive and recovery options instead of leaving the party exposed at low HP when the explosion arrives. The exact self-destruct threshold is not shown anywhere in its Libra description, so do not plan around a fixed percentage of 84,000.
Trial 3 describes an enemy that is calm in one moment and furious in the next, which points at an opponent whose behaviour changes partway through the battle rather than at a fixed script.
Watch its current state and adapt to it instead of running the same rotation through both phases. Keep the party healthy enough to absorb the aggressive stretches rather than healing to a thin margin, and take Stagger opportunities whenever they appear, since a staggered enemy is one that is not in either state.
Yakhanati, the Arch Gargoyles and the Dragon

The back half of the trials is where the shrine starts naming its enemies and showing their numbers.
- Yakhanati, Trial 4, is a Level 40 Stone-type with 87,000 HP
- Arch Gargoyle A, Trial 5, is a Level 40 Stone-type with 33,000 HP, fought alongside Arch Gargoyle B
- The Dragon, Trial 6, is Level 42 with 105,000 HP and a Lightning weakness
Yakhanati alternates between states that make either physical attacks or magic ineffective, and its Libra screen says so outright.
That makes it a party composition problem rather than a strategy problem. Bring both physical attackers and spellcasters into the fight instead of committing everyone to one damage type, because half your party being useless at any given moment is the intended cost.
When physical damage stops meaning anything, switch to magic. When magic stops landing, switch back. The only decision that matters on each turn is which category of attack can actually hurt it right now, and repeating an ineffective action is a turn thrown away against 87,000 HP.

The two Arch Gargoyles are marked A and B, and only A's numbers are shown.
The inscription in front of them talks about eternal life, which sounds like a revival mechanic and is not. The objective is simply to defeat both of them.
Both can be Staggered, which creates the usual openings for extra damage, and the practical approach is to focus everything on one of them first. Killing A before touching B cuts the number of attacks coming back at the party roughly in half for the remainder of the fight, which matters more here than spreading damage evenly.
The Dragon closes out the monster trials and carries the largest health pool of the six at 105,000.
Its affinity screen shows the Lightning weakness, which gives you both a reliable damage source and the fastest route to Stagger, so build the party's rotation around thunder magic before walking in.
The inscription also warns that a powerful breath attack is on the way. Set up defensive actions and get healing in place before it lands rather than reacting afterward, since the recovery turn you spend after the fact is a turn the Dragon also gets. Between breaths, go back to Lightning damage and Stagger pressure.
How to Complete the Final Paladin Trial

Past the monsters, the party reaches a final inscription, and it does not ask for another fight against the shrine.
It states that the two warriors who completed the trials together must now fight an earnest duel against one another, and that the winner receives the title of Paladin.
Rain and Lasswell are the intended participants, which the chapter has been building toward since the mountain path and arguably since the flashbacks in Zoldaad.
The requirement is not a performance. Sakura warns that if the two of them deliberately hold back, the shrine may reject them, which makes a staged fight the one way to fail here.
The duel is tied directly to the rivalry. Lasswell has spent years trying to become strong enough to stand beside Rain, and more recently has started questioning whether anything he achieves matters if Rain keeps surpassing him anyway. Rain wants him to fight seriously, and does not appear to care which of them wins as long as that happens.
Proceed with the confrontation when the party is ready.
Lasswell struggles at first to fight without reservation, which is exactly the failure state Sakura warned about, and Rain pushes him to stop holding back and show what all the training was actually for.
The duel resolves through their swordsmanship and through Tranquility, the technique Lasswell spent his childhood chasing and first mastered under Sir Raegen. The chapter is named after it for a reason.
Rain receives the Paladin title. That is a fixed story outcome rather than a competition you can win differently, and choosing another winner is not a route the chapter offers.
With the duel settled, the inner chamber opens.
How to Beat Gelidus and Finish Chapter 6

Gelidus is waiting inside, and he moved the Dark Crystal here specifically to test whoever came after it.
Gelidus is an exceptional warrior by any measure, and he moved the crystal here because he wanted to see who would come for it.
He starts by questioning whether Rain's companions are anywhere near the standard of the two who just fought each other. Then he looks at the party properly, abandons the idea of testing the Paladin alone, and challenges all of them at once.
That is the format of the fight. Unlike the duel immediately before it, this is a full-party battle with your normal abilities, support skills and party setup available. The Paladin trial is the only prerequisite for reaching him, and there is no shrine key or additional item to collect first.
When he loses, he acknowledges the party's strength rather than pressing the fight, which is consistent with having set the whole shrine up as a test in the first place.
The remaining members of the Sworn Six then arrive, and the confrontation produces the chapter's biggest surprise. Raegen is present himself, standing there in person, despite Umbra having acted in his place up to this point. The game does not explain how both can be true.
The confrontation does not get to finish. The ground starts shaking, because the dimensional gate connecting Lapis and Palladia is preparing to open, and the unstable magic around it threatens everyone standing nearby.
Raegen asks Sakura to teleport the party and the crystal clear of it. She cannot move a group that size and the Dark Crystal on her own magic, so a greater power is used to get everyone out.
Everyone survives. The Dark Crystal does not stay where it should. It is displaced during the teleportation, and nobody knows where it ended up, including the Sworn Six, which turns the rest of the story into a race rather than a chase. This is fixed story progression, so beating Gelidus differently or walking back into the inner chamber afterward changes nothing.
Left without a lead and without a destination, the party falls back on the one asset it has. They decide to take the Enterprise up and investigate anything unusual anywhere on the map, on the assumption that a displaced Dark Crystal will show up as something strange somewhere.
The search for the Dark Crystal, the Town of Sian and the route to the Wandering Lands are covered in Final Fantasy Resonance Walkthrough: Chapter 7.
Common Mistakes to Avoid in Chapter 6

Trying to cross the Bog of No Return before Holy. The bog is a story gate rather than a navigation problem. Finding the right path through the marsh achieves nothing until Fina has finished her training.
Looking for a shop that sells Holy. It is taught by the elder in Gaberads in exchange for the White Jade Stone. No vendor and no spellbook substitutes for that sequence.
Searching the laboratory for a route instead of the control panel. The central teleporter in the Research Center Ruins is dead until you operate the machinery on the Level 1 route. If it is not working, that panel is the reason.
Skipping the stone inscriptions in Sanctissimus Shrine. Each one describes the mechanic its fight is built around, and several of those fights are difficult to read from the enemy alone.
Chipping away at Dad Bomb. It self-destructs as its HP drops, and the threshold is not shown. Save enough damage to close it out quickly once the health bar starts moving.
Committing the whole party to one damage type against Yakhanati. It switches between physical and magical immunity, so a party built entirely around either one spends half the fight doing nothing to 87,000 HP.
Holding back during the Paladin duel. The shrine can reject a fight that is not earnest, which makes a deliberately soft duel the only way to fail the trial.
Expecting a second chance at the Dark Crystal. It is displaced during the escape from Sanctissimus Shrine as fixed story progression. Beating Gelidus differently or walking back into the inner chamber afterward does not keep it.


 Successfully copied... Thank you for sharing our content!:


Comments