



Control Resonant Orientation Walkthrough: All Objectives and How to Beat the Artist
Orientation is the opening mission of Control Resonant and it hands you three decisions that stick: a primary Aberrant form, a secondary Aberrant form, and a Combat Ability. It also ends in the Artist, a boss whose deadliest attack can be cancelled outright if you know where to stand. Everything below covers the full route, the collectibles on it, and the fight itself.
Orientation Quest Overview
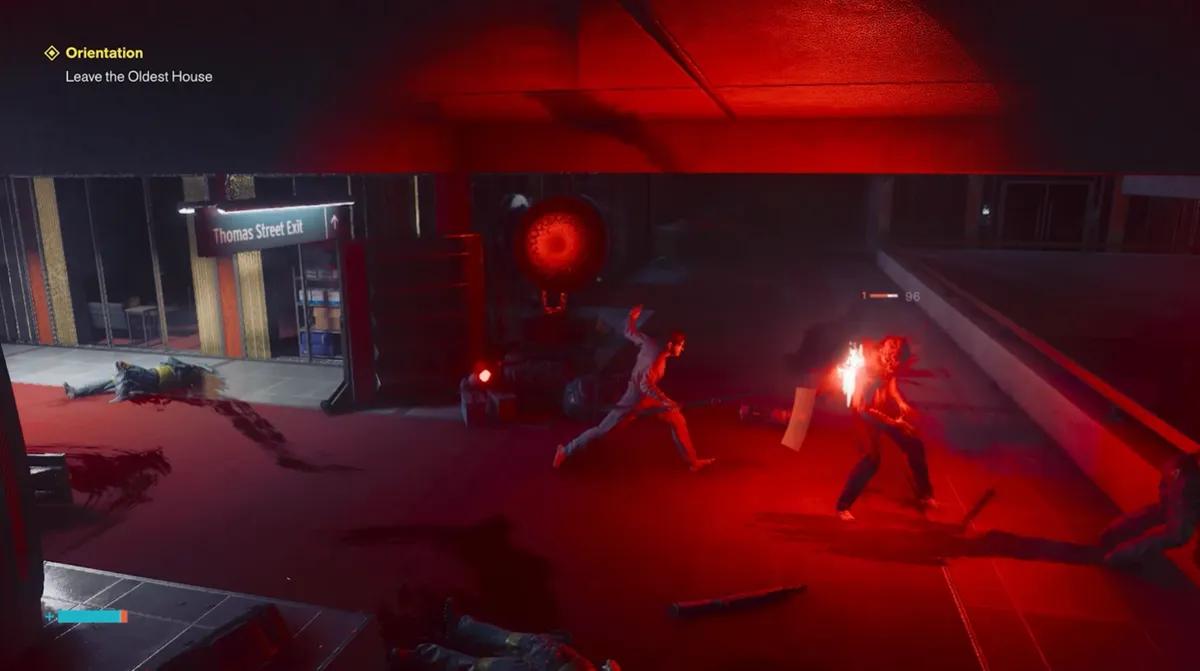
Orientation opens the Wake Up chapter and runs from Dylan Faden's cell in the Oldest House out into a broken Manhattan. There is no requirement beyond starting the game.
Chapter | Wake Up |
Starting location | Downtown, Oldest House |
Requirement | None, this is the first mission |
Boss | The Artist |
Unlocks | Welcome to Manhattan, the Gap, Double-Jump, Elevate, Rush |
Rewards | Untapped Badge 11-60, x1 Reset Item, x1 Living Shard, 1000 or 2000 Source |
For the full quest order across all three chains, see the Control Resonant Walkthrough Hub.
All Orientation Objectives

The quest log breaks Orientation into eight steps. The list below follows the in-game order, and the sections after it expand each one.
- Leave the Oldest House
- Meet Zoe at the Hotel Building
- Investigate the Alley
- Search for Jesse
- Complete the Ritual
- Find a Vantage Point
- Reach the Source of the Patterning
- Defeat the Artist
Two form selections and one ability selection sit between these steps rather than inside them, which is why the walkthrough covers them as their own sections.
Wake Up and Choose Your Primary Aberrant Form

The mission opens seven years after the first game, with Jesse Faden driving a metal rod into her unconscious brother's chest. Dylan surfaces inside a blank version of his cell with a single obelisk in the distance. Walk toward it, pause when the game stops you for the Board's dialogue, then hold F or the left bumper at the obelisk to wake up.
You are immediately asked to pick a primary Aberrant form. This is the weapon you will swing most often, and the choice is permanent once you leave the Gap later in the mission.
Form | Damage | Speed | Notes |
|---|---|---|---|
Strike | 30-60 | Fast | The only form with Critical Chance, at 30% |
Glaive | 70-90 | Medium | Long reach, hits multiple enemies and pushes them back |
Cleave | 65 | Medium | Flat damage, hits harder from behind |
Strike suits players who want to rush in, land a burst and reset. Glaive is the crowd-control pick thanks to its reach and knockback. Cleave is the all-rounder, and its backstab bonus scales with an upgrade you can buy later. None of the three is a trap, and later upgrades cover their weak points.
Leave the Oldest House

Check the small table outside Dylan's cell for two collectibles, then head through the double doors with the green light. The corridor splits: Prime Candidate Training on the right is behind a Level 18 lock you will not have for a long time, so take the opposite door toward Central Executive.
Push through the security checkpoint to a closed gate. The room to the left holds a collectible, and the room on the other side has a terminal with a large red button that opens the gate. Search the table opposite the terminal before moving on.
The next room is worth a slow pass. A desk against the large pillar holds a collectible, and the Safe Room with the bright white light holds another plus a Resource Crate with Aberrant Slivers and Source. Aberrant Slivers feed weapon upgrades, and Source is the game's currency, spent at Vendors.
Take the elevator down and step into Central Executive.
Defeat the Hiss at Central Executive

The Hiss here are the weakest grunts in the game and die to a few hits. Attack with X, Square or the left mouse button. Clear the lower level, climb the staircase and go left.
Most of the doors upstairs need Level 1 or Level 2 clearance you will not get until Welcome to Manhattan, but you can see Resource Crates and collectibles behind several of them. Note the area and come back after the next mission.
The second Hiss wave teaches Dodge, which is your defensive move and your out-of-combat sprint substitute until Rush unlocks. The third teaches Health Elements, the small blue orbs that drop from kills. Picking them up is the only reliable way to heal in Orientation.
Before the last stretch, open the door under the large FBC insignia. Jesse's office holds four collectibles across the desk, bookshelf and sofa. Then follow the hallway, take the elevator down through the lobby, and interact with the broken barrier to step outside.
Meet Zoe at the Hotel Building

Dylan lands in a Manhattan full of Hiss-possessed bodies floating in the air. Pull one down to grab a radio and you will meet Special Agent Zoe de Vera, who points you toward a white hotel building in the distance.
You have no map yet, so navigation is visual. The hotel sits to the south of the Oldest House. Follow the street toward the wreckage, fight the Hiss at the cross street, then turn right and continue. When the road stops being walkable and curves upward into the sky, turn left and follow the alley south.
This is also where the game starts placing points of interest, marked with a white eye icon. Look at one and hold the prompt to open the comms wheel, then hold the cursor on the option until the gauge fills. Reporting is optional and changes nothing mechanically, but it fills in world detail and, later in the game, unlocks side quests.
The alley triggers your first Arena Encounter. Barriers seal the area until every Heavy enemy is dead. Drones keep respawning while a Heavy lives, so kill Heavies first and farm the drones for health orbs only when you need them. Clearing it pays out x1 Distorted Form and Source.
Choose Your Secondary Aberrant Form

The second selection is slower and heavier than the first, and it applies Falter, the yellow stun bar under an enemy's health.
Form | Damage | Falter | Notes |
|---|---|---|---|
Crush | 127-222 Blunt | 21-42 | Chargeable hammer, strong against shields |
Drill | 95-280 Sharp | 0-21 | Chargeable, best against soft targets |
Extend | 63-127 Raw | 0-21 | Long range, hits several targets, no damage-type advantage |
Pick something that covers what your primary lacks. Fast and short-ranged Strike pairs well with Crush for burst or Extend for reach. The other consideration is damage type: armored enemies later in the game are weak to Blunt, which makes Crush quietly the most convenient pick if you are not sure.
A second Arena Encounter starts the moment you choose, so you get to test it immediately. After that, keep heading south, hop the fence, and move over the buildings past the white van. Climb the stairs, turn left onto the short building, cross the roof, and use Dodge in mid-air to dash the gap. Follow the rooftops, turn left at the graffiti wall, and take the street south to the ledge where Zoe waits.
Her conversation establishes that the chasm splitting Manhattan is an Altered World Event, and that the AWE is hostile to the Hiss rather than allied with it. Dialogue options here are flavour only, though some of them pull out extra background. Picking "Need to find the Director" gets Zoe asking after Trench, which tells you she was outside the Oldest House before the events of the first game.
Investigate the Alley and Search for Jesse

Follow Zoe into the alley behind a trail of frozen pigeons. The alley ends in a drop she cannot make. Jump the rail onto the rooftop far below, then keep leaping north from roof to roof, aiming for the buildings lit orange.
A vision of Jesse plays partway through. After it, walk to the roof's edge, spot the orange-lit rooftop below and drop to it. The pigeons are funnelling into a broken window above the door, and the doors open as you approach.
Inside, head down the stairs into a dark space with a concrete path and a platform of yellow vegetation. In the centre is a CRT television next to a retro console. Interact with the TV.
Complete the Ritual
This drops you into the realm between, a black void strung with amber-coloured platforms. The section is a traversal tutorial, and each television grants an ability.
- Follow the golden path to the ledge over the parking lot and interact with Jesse. She and Dylan briefly swap places.
- Double-Jump unlocks when new platforms appear. Jump, then jump again.
- The next TV grants Elevate. Jump and hold the jump input to float across gaps.
- The TV after that grants Rush, a short sprint that leaves after-images and builds momentum for longer leaps.
The tunnel of shifting objects after Rush is the only part of this section that can kill you. Wait for it to open, then Rush the whole length without stopping. Anything slower gets you crushed and reset to the start of the tunnel.
Two more televisions follow, each surrounded by Christmas objects that fill in as you go. The last one triggers the cutscene where Dylan and Jesse try to close the Fault together and fail. Jesse tells him something already leaked into the city.
This completes the ritual and awards a video collectible, I Have to Go, filed under Jesse Faden in the Archives.
Find a Vantage Point and Reach the Source of the Patterning

Run down the path past the last TV to leave the building. Zoe makes contact and asks Dylan to look at the wave the city is projecting.
Cross the gaps west using your new abilities. One Arena Encounter blocks the way, so clear the Heavies. Past it, a patch of deep red light winks out as you approach and the Hiss bodies drop out of the sky, which is the Patterning killing them rather than anything you did.
Continue west to a building flanked by taller ones. Climb the shorter buildings behind them to reach the roofs, then cross to the mirrored art gallery. The exhibit belongs to an artist named Cassia Nomura. Walk to the back and interact with the mirrored door.
How to Beat the Artist

Type | Resonant Entity, first boss |
Arena | Circular, built from streets and vehicles |
Phases | One transition, triggered at the blue orb on the health bar |
Threat | Thrown objects, close-range sweeps |
Reward | Untapped Badge 11-60, x1 Reset Item, x1 Living Shard, 1000 or 2000 Source |
The Artist is the top half of an enormous head that slides around the arena throwing the city at you. The blue orbs on her health bar mark points where she drops Health Elements, so treat them as free healing checkpoints rather than damage targets.
Taxi Toss. She lifts a cab and hurls it. Rush to bait the throw at your old position, or Dodge on the frame it reaches you. After the phase transition she throws two.
Traffic Lights. At close range she swings clumps of lights like batons. Held vertically means a downward slam, so Dodge as they start moving. Held horizontally means a wide sweep, so jump and attack her face, which keeps you airborne between the two swings.
Cement Volley. A horizontal line of cement chunks fired in two waves. Jump the first, Dodge the second, close the distance in between.
Object Barrage. Streams of junk from range. Approach at an angle instead of straight on.
The fight turns at roughly 30% of her health gone, at the blue orb. She flies up, the underside of her head glows yellow, and she rings herself with floating chunks of street before firing them all at you. That barrage is very hard to survive, and the answer is to never let it finish.
The moment she rises, look at the ground for clouds of dirt. Standing on one lifts you up on a slab of asphalt. At the top of its arc, Double-Jump and Elevate onto her head and hit the glowing section underneath. This cancels the attack, deals heavy damage, and drops her stunned for a free punish window.
Afterward she adds rockfall along the path she slides across, so stop chasing her directly and cut the corner instead. Everything else repeats. When the prompt appears above her head, press it for the Execution.
Which Combat Ability to Pick
Approach her corpse and hold F or the left bumper to choose your first Combat Ability. These consume Power, which you build by hitting things.
Ability | Damage | Power cost | Best for |
|---|---|---|---|
Barrage | 60-180 Blunt, 12-36 Falter | 400 | Single-target damage at range |
Volatile Anomaly | 150-350 Blunt explosion, up to 180 Falter | 300, plus 120 to throw | Burst damage, scales as its health drops |
Shield | 100 Blunt, 60 Falter on bash | 150, plus 180 to bash | Defence and a ram attack |
Barrage and Volatile Anomaly suit ranged playstyles. Shield locks out your Aberrant while held, but Shield Bash turns you into a battering ram and gets considerably better with upgrades. All three are Blunt, which matters because armored enemies appear two missions later and Blunt is what strips armor.
After choosing, the game drops you in a training space to practise, then into the Gap. The Gap is your hub for upgrades, Talents and Artifacts, and it is the last place you can reset your form picks before they lock. Reach it any time by holding down on the d-pad or G on keyboard.
All Collectibles in Orientation
Collectible | Where to find it |
|---|---|
A Photo Of Dylan And Jesse | Small table outside Dylan's cell |
Notes On The Ordinary AWE Case File | Same table |
Medical Report | Room with the green light, left of the closed gate |
A Memo On Dylan Faden | Table opposite the gate terminal |
Complaint Letter | Desk against the large pillar |
Containment Guard Note | Bunk inside the Safe Room |
Dimensional Research: Slide Repairs | Jesse's office |
Jesse's ID | Jesse's office |
A Letter From Emily Pope To The Director | Jesse's office |
Jesse's Notes To Self | Jesse's office |
I Have to Go | Awarded for completing the ritual |
A Fantastic Opportunity | Dr. Darling video, plays before the credits |
The Safe Room also holds the mission's Resource Crate. Everything in the Archives is sorted by type, and new entries carry a red triangle.
Orientation Rewards

Beating the Artist pays out the Untapped Badge 11-60 Artifact, x1 Reset Item, x1 Living Shard and Source. Sources disagree on the Source amount, listing either 1000 or 2000, so treat the exact figure as unconfirmed until you see it drop.
The Badge is an Artifact, which means it grants a buff when equipped. Some Artifacts carry a drawback alongside the buff, so read the full description before slotting one.
Common Mistakes
Treating Dodge as optional. There is no block in Control Resonant. Dodge is your entire defensive kit until Shield, if you take it.
Retreating to heal. Health only comes from killing things and picking up the orbs. Backing off in an Arena Encounter makes your situation worse, not better.
Killing drones first. They respawn indefinitely while a Heavy is alive. Kill Heavies, use drones as healing.
Chasing the Artist after her phase transition. Rocks fall on the line she travels. Move laterally and intercept.
Missing the asphalt lift. The dirt clouds only appear while she is airborne. If you spend that window running away, you eat the full barrage.
What to Do Next
Orientation ends with Emily Pope, now acting Co-Director alongside Simon Arish, explaining the Patterning and the Resonant Entities it produces. She sends Dylan after more of them and names the West Incursion Zone as a starting point.
The next mission is Control Resonant Welcome to Manhattan Walkthrough, which opens the Contain the Crisis chapter, unlocks the map, and gets you a Level 1 Keycard.


 Successfully copied... Thank you for sharing our content!:



5% deposit bonus up to 100 gems

a free Gift Case





EGAMERSW - get 11% Deposit Bonus + Bonus Wheel free spin


EXTRA 10% DEPOSIT BONUS + free 2 spins

3 Free Cases + 100% up to 100 Coins on First Deposit


5 Free Cases, Daily FREE & Welcome Bonuses up to 35%

3 free cases and a 5% bonus added to all cash deposits.

+5% to deposit




Comments