




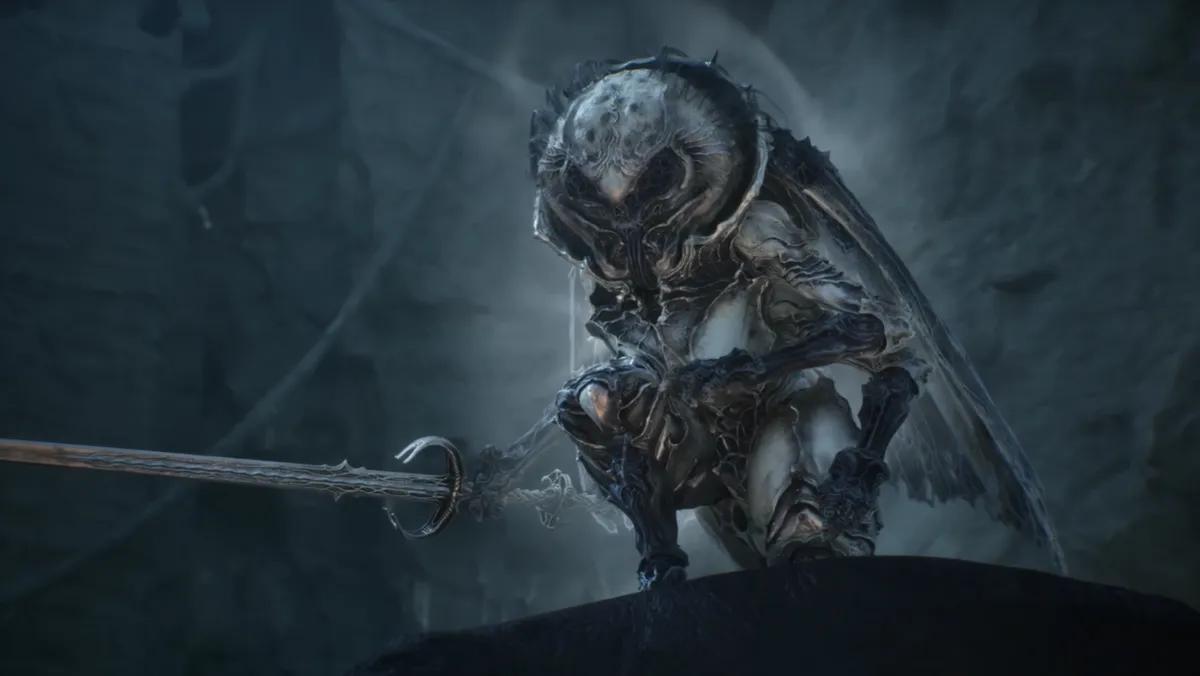
All Bosses in Mortal Shell 2: Locations, Order and Full Checklist
 Steam
Steam Xbox
Xbox PlayStation
Mortal Shell 2 puts 47 distinct boss encounters between you and the credits, and only nine of them are mandatory. The rest guard Shells, weapons, Tarstones, and the Grisha Remnants that quietly become one of the strongest tools in the game. Progression runs on Corrupted Gates and Beacon Dungeons across Fainweald and the Ruins of Mammon, feeding you the Ova that opens The Unfound Path for the endgame. No fixed path exists, so regional gates can be cleared in whatever order your build prefers. This guide lists all bosses in Mortal Shell 2 with their closest beacon, their rewards, and how each one falls.
How Many Bosses Are There
Outside counts range from ten to forty-five, and the spread comes entirely from where each writer draws the line. Some tally only the gate bosses that must die for story progression. Others count every roaming elite with an extended health bar, every mob encounter given a name on screen, and every optional guardian. Working from named health bars, the roster reaches 47.
Category | Count | Required |
|---|---|---|
Major campaign bosses (prologue, gates, key beacons) | 9 | Yes |
Dungeon minibosses inside required paths | 3 | Yes |
Optional and quest bosses | 35 | No |
Reaching the credits only demands the nine primary targets, since those secure the Ova and trigger the final dungeon. Skipping the rest costs you weapon-refining Tarstones, several Grisha Remnants, and every Shell beyond the two pinned on your map at the start. All Shells in Mortal Shell 2: Where to Find Them, Unlocks and Best Picks covers exactly which bodies sit behind which fight, and three of them are gone if you leave the wrong beacon behind you.
The Full Boss Checklist

Use this to track the run. Regions run in rough progression order, though the game rarely forces the sequence. Whatever you carry into these fights shapes them more than any stat page, and All Weapons in Mortal Shell 2: Tier List and Where to Find Each One breaks down which movesets survive strings of unblockable attacks and which get you killed holding a swing.
Boss | Region | Type | Notable Reward |
|---|---|---|---|
Gloombound Ritualist | Prologue | Mandatory | Ritualist Staff Component |
Tainted Vestige | Prologue | Optional | Living Root Ember, Tarstone |
Tar Golem | Prologue | Mandatory (scripted) | Vatra's Seal, achievement |
Great Arbiter of Flesh | Fainweald | Optional, missable | Arbiter Greatsword |
Vrannic, the Grand Illusionist | Fainweald | Mandatory | Mirror Fragment, Tarstone |
Circle of the Grasping Root | Fainweald | Optional | Grasping Root Talisman |
The Wandering Shepherd | Fainweald | Optional | Shepherd's Hex Charm |
Magdalena, the Lady of the Woods | Fainweald | Optional | Blazing Wheel Fragment, Tarstone |
Broodshell Swarm | Fainweald | Optional | Gloom |
Flooded Village Grisha | Fainweald | Optional | Grisha Remnant |
Grisha Matron | Fainweald | Optional, choice-locked | Grisha Remnant |
Lucian, the Thirsting Knight | Fainweald | Mandatory | Vampire Sigil |
Tarblighted Stoner | Fainweald | Miniboss | Tar Infusion, Tarstone |
The Lost Child | Fainweald | Mandatory | Devoured Flesh, Tarstone |
Bloodcursed Lithopod | Fainweald | Optional, quest-linked | Citadel Gate Lever |
Gloomshade Grove Grisha | Fainweald | Optional | Grisha Remnant |
Rabid Grisha Pack | Fainweald | Optional | Two Grisha Remnants, Inflamed Clawstone |
The Warden | Fainweald | Optional, missable | Eredrim Shell |
Vrago, Solikar Champion | Fainweald | Mandatory | Solikar Spark |
Gloombound Legion | Fainweald | Optional | Gloom |
Tishina's Confessor | Fainweald | Optional | Confessor's Keepsake |
The Nameless Captive | Fainweald | Mandatory | Executioner Blade Shard |
Pale Grisha | Fainweald | Optional | Grisha Remnant |
Bor the Deluded Monarch | Mammon | Optional | Gloom, Tarstone |
Twin Sesters | Mammon | Optional | Black Needle |
Sester Secundus | Mammon | Optional | Sester's Censer, Genessa Shell |
Caged Grisha | Mammon | Optional | Grisha Remnant, Fusillade Stone |
Urrig, the Executioner | Mammon | Optional | Warden's Stone |
Tyrant's Sychophants | Mammon | Optional | Gloom |
Droeg, the Conquerer | Mammon | Mandatory | Frost Core, Tarstone |
Viletongue Batushka | Mammon | Miniboss | Ovum access |
Vellen, High Lord of Mammon | Mammon | Optional | Lazlo Shell, Tarstone |
Prophet of Profane Infinities | Mammon | Optional | Obsidian Hammer, Tarstone |
Subjugated Guardian | Mammon | Optional | Ballistazooka |
Infested Miner | Mammon | Miniboss | Miner's Double Pick, Tarstone |
Strange Grisha | Mammon | Optional | Grisha Remnant |
Hexapod | Mammon | Mandatory | Brood Pearl, Tarstone |
Starved Harridan | Mammon | Optional | Gloom |
Sariel, the Endless | Mammon | Optional | Sariel Shell, Clockwork Scythe |
Gloombound Wraith | Mammon | Miniboss | Archive Tome Page, Tarstone |
Solnir, the Gloom Seeker | Mammon | Optional | Gloom |
Servants of the Scholar-Prince | Mammon | Optional | Gloom |
Sir Isaac, the Scholar-Prince | Mammon | Mandatory | Mutation Essence, Tarstone |
The Monolith | The Unfound Path | Mandatory | Tendril cleared |
Malborn Offspring | The Unfound Path | Mandatory | Tendril cleared |
Orrem, the Discarded Golem | The Unfound Path | Mandatory | Tendril cleared |
Zmey, the Unbidden | The Unfound Path | Final boss | Campaign completion |
Boss Order and Progression Structure
Progression splits into two phases. Fainweald and the Ruins of Mammon hold six Corrupted Gates between them, and killing the boss at the end of each activates a Beacon that hands over an Ovum. Deposit all six and the seal over The Unfound Path lifts. Inside, three tendril bosses can be tackled in any order before the final encounter opens. Every one of those fights goes faster with upgraded gear, and Tarforge in Mortal Shell 2: Unlock Items, Materials and Upgrade Order covers which unlock item switches on the bench you need first.
A route that matches the difficulty curve rather than the map layout looks like this:
- Tar Golem in Disciple's Grotto, which teaches Harden timing whether you win or not.
- Droeg, the Conquerer in the Valley of the Revered, whose frost patterns are readable enough to bank a first Tarstone against.
- Vrago, Solikar Champion, then The Nameless Captive, which open shortcuts and let you practise punish windows on a target that telegraphs everything.
- Lucian, the Thirsting Knight, then The Lost Child, cleansing the Stonebled Gate and opening the Sanguine Caverns crafting materials.
- Sir Isaac, the Scholar-Prince, a pure reaction test against a two-phase moveset that kills in two hits.
- Hexapod in Withered Shoals, the last regional gate and the one that punishes poor add control.
- The three Unfound Path tendrils, then Zmey.
That order banks weapon upgrades before the fast late-game movesets appear. Straying from it costs nothing structural, since the gates unlock independently of each other.
Grisha Remnant and Summon Help
Two systems let you bring backup, and the second is stronger than its description suggests. Most major arenas have an Effigy Shrine outside the fog gate that manifests an AI phantom for a flat 2 Glimpses of Insanity per attempt. The phantom trades hits and pulls aggro, breaking up long attack strings so you can heal or charge something heavy from behind. The fee is consumed per attempt, so wiping means paying again, but summoning costs you nothing in dropped Gloom, Tarstones, or achievement progress.
The Grisha Remnant is the one worth building around. Equipped as an active it summons a Grisha on demand; as a passive it gives melee hits a 2% chance to summon one on their own. Both look unremarkable until Tier III, where damage and proc rate both scale with how many Remnants you have collected across the world.
Tier | Active | Passive |
|---|---|---|
Tier I | Summon a Grisha ally | 2% summon chance on melee hit |
Tier II | One extra use per rest | 2% summon chance on melee hit |
Tier III | Damage scales with Remnants found | Summon chance scales with Remnants found |
Eight sources exist. The Grisha Hunter near the Mushroom Village Beacon sells one for 2000 Coins, and the other seven come off Grisha fights listed further down: the Flooded Village Grisha, the Grisha Matron, the Pale Grisha, the Rabid Grisha Pack (which drops two at once alongside the Inflamed Clawstone), the Gloomshade Grove Grisha, the Strange Grisha, and the Caged Grisha (which also drops the Fusillade Stone). Run the passive on an aggressive melee build so the procs fire on their own, and the active on fights where you want the summon at a specific moment. Against the Malborn Offspring and Orrem, a stack of Remnants does more work than any Tarstone in the game.
How To Prepare for Any Boss
When an encounter keeps sending you back to the checkpoint, the fix is usually in the setup rather than in your reflexes. Four things are worth checking before crossing a fog gate.
Spend accumulated Gloom on stat nodes at the nearest shrine, since extra health and stamina cover for roll timings that are still slightly off. Push your primary weapon and your ranged slot up a tier at the Tarforge, because a single reinforcement level visibly shortens boss phases. Match your Tarstone infusions to what the target actually fears, since Droeg melts under fire while the Sanguine Caverns beasts fold to physical Break damage. And stop wearing the same Shell out of habit: high-stamina bodies like Tiel handle flurry attacks, while Eredrim absorbs single heavy hits that would knock a lighter Shell out entirely.
Your sidearm carries more of this than most players expect, and All Sidearms in Mortal Shell 2: Tier List, Locations and Best Tarstones covers which ones break a boss out of an animation and which just waste Resolve. I lean on the Troubadour's Lute more than anything else in the roster, because half the fights below are mobs wearing a boss health bar, and turning them on each other ends the encounter before it starts.
Prologue Bosses
Three encounters sit in the tutorial zone. One is scripted to be lost, one is easy to walk past, and one teaches the mechanic the whole game runs on.
Gloombound Ritualist

The first boss in the game, and impossible to miss on the way through the prologue.
Detail | Value |
|---|---|
Closest beacon | Village Outskirts |
Area | Arena past the bridges and cliff walls |
Reward | Ritualist Staff Component, Gloom |
The Ritualist itself hits softly. Its summoned minions are the threat, since they rush you and detonate in bloody bursts that take a huge chunk of health per hit. Dodge the moment one moves toward you, and close in only during the pause between summoning waves. This is the cleanest place in the game to practise Perfect Guards and Harros' Stone Stun, and a few Naylshotte blasts finish the job.
Tainted Vestige

A considerably heftier fight than the Ritualist, and one many players skip entirely.
Detail | Value |
|---|---|
Closest beacon | Disciple's Grotto |
Area | Grove through the exit on the left of the cave |
Reward | Living Root Ember, early Tarstone |
It opens by burying its arms in the earth and firing two sets of underground spikes, so be ready to dodge before it has finished the animation. Every melee swing it throws is well telegraphed and ideal Perfect Guard fodder. The exception is an unblockable grab that stuffs you into its maw, which ends the attempt outright if it connects. You will fight weaker versions of this thing as normal enemies later under the name Tarred Vestige.
Tar Golem

The prologue finale, and a fight the story expects you to lose.
Detail | Value |
|---|---|
Closest beacon | Disciple's Grotto |
Area | Boss room past the Bone Gate |
Reward | Vatra's Seal, missable achievement |
Go down the slope from the beacon, beat the armoured foe waiting there, then ride the air current up and follow the path past Ruk to a massive Bone Gate. The Golem swings twin flaming axes in rapid, high-pressure combos, and running out of stamina against its sweeping strikes or leaping slams is fatal.
You can still win. Dodge to its side and punish whenever it plants both axes in the ground and charges. Anything it throws with a single axe, plus its occasional kick, can be guarded. Nothing it does with both axes raised or in the air can. Depleting the health bar unlocks the "No, You Still Can't Win" achievement and Vatra's Seal, which gives you the Harden mechanic and Break damage on a Perfect Harden. Dying instead advances the story with no penalty, but locks the achievement until another playthrough. Either way, the cutscene plays and Harros gives up his shell so you can continue.
Fainweald Bosses
Twenty encounters fill Fainweald, and only four of them are mandatory. This is where most of the Grisha Remnants live, where two Shells are hiding, and where one boss disappears forever if you activate the wrong beacon first.
Great Arbiter of Flesh

A wandering greatsword wielder in the open world, and one of very few permanently missable fights.
Detail | Value |
|---|---|
Closest beacon | Widow's Overlook |
Area | Dirt clearing south of the beacon, toward Mushroom Village |
Reward | Arbiter Greatsword, high Gloom |
Fighting him before unlocking Tiel or Proxima is brutal, and even with a Shell he punishes sloppy timing. He feints constantly, appearing to strike one way before twisting from the other side, so hold your parry until the blade commits. His grab is unblockable and hardening does nothing, since he takes your Shell by the throat and impales it mid-air. He despawns once the regional Beacon activates.
Vrannic, the Grand Illusionist

Boss of the Hall of Illusions, one of the four mandatory Fainweald encounters.
Detail | Value |
|---|---|
Closest beacon | Mushroom Village Gate |
Area | Hall of Illusions, unlocked by cleansing the beacon |
Reward | Mirror Fragment, Tarstone, Gloom |
The first half is simple: dodge his projectiles, avoid the unblockable staff strike, punish the recovery. Halfway through he vanishes and spawns copies, filling the screen with tracking projectiles. Each copy dies to a single hit, so clear them with melee, which also banks enough Resolve to open the real Vrannic with a sidearm blast when he returns.
Circle of the Grasping Root

A mob fight dressed up as a boss, and the single best advertisement for the Troubadour's Lute.
Detail | Value |
|---|---|
Closest beacon | Sleeping Mire |
Area | Rootwater Hollow, in the Sunken Village |
Reward | Grasping Root Talisman, Gloom |
You face one large Frog Mama alongside three poison-throwing cultists, which makes it a crowd problem rather than a boss problem. Play the Lute a couple of times and the cultists turn on each other while you pick off whatever survives. Tiel handles this fight even more easily with a poison-focused tree, since the right skill points let him heal from the poison being thrown at him.
The Wandering Shepherd

An unusual chase fight that becomes a second boss halfway through.
Detail | Value |
|---|---|
Closest beacon | Sunken Village |
Area | Fenced enclosure across the bridge |
Reward | Shepherd's Hex Charm, Gloom |
Sprint at him and hit him immediately. After a hit or two he teleports away and every sheep in the pen turns hostile, starting a chase against a fast target surrounded by slow ones. Sheep attacks parry, and a perfect one triggers a riposte where your Shell grabs the animal by the hooves. They hold more health than they should, so focus the Shepherd. At half health he becomes the Tarblighted Shepherd and turns you into a sheep too, which does not stop you hitting him.
Magdalena, the Lady of the Woods

The most entertaining fight in Fainweald and one of the more chaotic in the game.
Detail | Value |
|---|---|
Closest beacon | Sunken Village |
Area | Past the crack in the arena fence, beyond Ruk |
Reward | Blazing Wheel Fragment, Tarstone |
She fights from a rocket-powered mobility scooter, driving through the arena and leaving fire behind her. Openings are rare at first because she keeps forcing you to dodge. Stay to her side to avoid the flames venting from the back of the vehicle, and count her donuts, since she always spins twice before stopping. That pause is your window. Her scooter also gets stuck occasionally, which is the moment to use a sidearm if you are out of melee range.
Enough damage grants two Ripostes where you climb onto the scooter and stab her repeatedly. She later summons mutated Tar Babies that die in one or two hits, and clearing them generates Resolve, so treat them as fuel. Smert can be summoned here, though he rarely lasts.
Broodshell Swarm
Three enemies sharing one health bar, tucked into a corner of the Blackridge Cliffs.
Detail | Value |
|---|---|
Closest beacon | Blackridge Pass |
Area | Watery clearing north-east of the Stones of Remembrance |
Reward | Gloom |
Two Leechtongues and one Bell Snail make up the swarm. Kill the Leechtongues first, since their lunging attack is unblockable, and each one buries its head in the dirt afterwards leaving a long vulnerable window. The Bell Snail is slow and simple once they are gone, with nothing more dangerous than an occasional retreat into its shell.
Flooded Village Grisha

An optional Grisha boss that rushing players walk straight past.
Detail | Value |
|---|---|
Closest beacon | Blackridge Pass |
Area | Arena in the east of the Flooded Village dungeon |
Reward | Grisha Remnant |
Reach the dungeon by crossing the rope bridges south of the beacon, clearing the cultists at the archway, breaking the wood, and peering through to manifest the opening. The Grisha itself is a Break check: parry or harden its blade-arm swipes, build Break damage until it topples onto its back, and punish. Its one unblockable is signposted by a roar followed by an upward spinning thrust. An air current in the room lets you take free sidearm shots from above, though Resolve runs out long before the fight does.
Grisha Matron

A fight you only get if you make a specific choice earlier, and lose permanently if you do not.
Detail | Value |
|---|---|
Closest beacon | Mushroom Village |
Area | Grisha Hunters' camp |
Reward | Grisha Remnant |
The Grisha Pup near Mushroom Village sits caged by Hunters, and freeing it triggers this encounter later at their camp. She fights like the other Grisha, so the usual approach works: corner her, break her stance, punish the knockdown. Anyone chasing all eight Remnants has to free the Pup, which means this one is decided hours before the fight actually happens.
Lucian, the Thirsting Knight

Mandatory, and the fight that cleanses the Stonebled Gate.
Detail | Value |
|---|---|
Closest beacon | Stonebled Gate |
Area | Hidden Keep, on the ruined bridge past two armoured knights |
Reward | Vampire Sigil, Sanguine Caverns access |
Lucian is a lizard-like vampire with quick scimitar strikes that hurt but can be blocked or dodged once you have seen them twice. He heals from connecting hits, so ranged sidearm shots and poise-breaking heavies matter specifically because they interrupt his lifesteal animation. As you knock him around, his helmet falls off, he reddens, and he escapes in a cloud of bats.
He returns in the final room where the Ovum sits, this time invisible, which makes parrying guesswork. Harden through the opening exchange and land one heavy hit to force him visible. Keep combos flowing afterwards, since staggering him stops him vanishing again.
Tarblighted Stoner

A miniboss on the mandatory route through the Sanguine Caverns.
Detail | Value |
|---|---|
Closest beacon | Sanguine Shoreline |
Area | Cave entrance through the transporter |
Reward | Tar Infusion, Tarstone |
He is one of the big rock-throwing brutes from the overworld, on fire. Build Break damage with heavy swings and stay clear whenever he picks a boulder up, because he will strike three or four times with it before throwing. Sometimes he throws twice in a row. Every throw is unblockable, so treat the pickup animation as your cue to move rather than to attack.
The Lost Child

Mandatory, grotesque, and one of the best arguments for carrying a ranged option.
Detail | Value |
|---|---|
Closest beacon | Sanguine Shoreline |
Area | Cavern above the Tarblighted Stoner, past Ruk |
Reward | Devoured Flesh, Tarstone, Gloom |
The Lost Child is a slug-like mass of flesh that vomits acid streams, swallows you whole, and expels you across the arena. Two of its attacks cannot be blocked: one arm swipe, and the inhale that drags everything nearby into its mouth. Dodge both rather than trying to tank them.
The cleanest approach uses the Forgotten Crossbow from raised ground, infused with Burn through the Emberseed Stone and firing volleys with the Barrage Stone. That chips a real portion of the bar without entering the acid. Melee works if you stay tight to its rear flanks, where the frontal bite hitboxes cannot reach.
Bloodcursed Lithopod

An optional boss that is functionally mandatory, since it holds the key to the Citadel of Penance.
Detail | Value |
|---|---|
Closest beacon | Gloomshade Grove |
Area | Watery area through the Bone Gate teleporter to the south |
Reward | Citadel Gate Lever, Gloom |
From the beacon, turn into the Grisha Hunter clearing, then right past a Tainted Vestige into rocky ground full of small Lithopods. Head south to the Bone Gate. An axe-wielding enemy jumps you on arrival, and the Lithopod appears shortly after you start exploring. Despite the size, it is a simple fight: hammer the rock on its back with heavy attacks. It applies Bloodcurse, which drains your health steadily, so parrying its blows carries a hidden cost.
Gloomshade Grove Grisha
An overworld Grisha already under attack when you arrive.
Detail | Value |
|---|---|
Closest beacon | Gloomshade Grove |
Area | Open ground near the Hunters |
Reward | Grisha Remnant |
Hunters are fighting it when you walk in, which thins its health before you commit. Do not rely on them to finish, because they rarely do and the Grisha often turns on you mid-fight. Standard Grisha rules apply: corner it, break its stance, and punish the knockdown rather than trading hits in the open.
Rabid Grisha Pack
The most efficient stop on the Remnant hunt, and a cramped fight against two of them at once.
Detail | Value |
|---|---|
Closest beacon | Gloomshade Grove |
Area | Holding Cells, entered through the well outside the Citadel of Penance |
Reward | Two Grisha Remnants, Inflamed Clawstone |
Head through the Hunter clearing behind the beacon, turn left toward the citadel outskirts, and drop into the well among the gravestones. The cage holding the pack sits behind a door on the lowest watery level, opened with the Feeding Room Key from a ramshackle structure nearby. Two Grisha in a tight room is a losing proposition head-on, so confuse both with the Troubadour's Lute, let them maul each other, then finish whichever survives.
The Warden

The fight that hands over Eredrim, and one that vanishes if the world state shifts first.
Detail | Value |
|---|---|
Closest beacon | Citadel of Penance |
Area | Central arena, reached by lift from the lower dungeon level |
Reward | Eredrim Shell, Tarstone |
Drop into the pit from the courtyard, circle the lower level until you find the lift and its lever, then ride up and walk forward. The Warden drops from above and collapses the floor into the arena.
Almost every attack he throws is unblockable, and the arena is crowded enough that dodging is genuinely hard. His worst move is a four-spin sequence where he slams his axe down on each rotation, leaving a short window after the fourth. A Burn or Poison infusion pays off here because damage over time works while you are busy retreating. Interrupting him is the other half of the answer, whether with summoned Grisha spirits from the Remnant or with a thrown Battle Axe via the Infused Stone.
Vrago, Solikar Champion

Mandatory, and the gatekeeper for Prisoner's Domain.
Detail | Value |
|---|---|
Closest beacon | Nochtean Gate |
Area | End of the Abandoned Shrine |
Reward | Solikar Spark, Prisoner's Domain access |
Vrago carries a makeshift chakram but mostly uses it to land unblockable jumping slams. His tracking during forward dashes is poor, so sidestepping and punishing works consistently. He is most vulnerable in the moment after landing, which is also when overcommitting will get you flattened by the follow-up. Interrupt him the same way you interrupt The Warden.
Gloombound Legion
Barely a boss, and another Lute demonstration.
Detail | Value |
|---|---|
Closest beacon | Hangman's Scaffold |
Area | Gloomstricken Garrison, immediately after cleansing |
Reward | Gloom |
This is a small mob of Gloom Seekers and Foul Knights sharing a boss banner. None of them threaten you alone. Play the Lute, let the group dismantle itself, and mop up. If you would rather fight it straight, keep moving so they cannot surround you, since the only real danger is being pinned in a corner.
Tishina's Confessor

A warm-up that teaches the tactics you need for the fight immediately after it.
Detail | Value |
|---|---|
Closest beacon | Executioner's Pulpit |
Area | Tower through the Bone Gate teleporter |
Reward | Confessor's Keepsake |
His sickle hurts badly on contact, but nothing he does is unblockable and every swing is clearly telegraphed. Parry through the combos, or stagger him with a Perfect Guard or Perfect Harden and punish the stumble. Ranged sidearm fire softens him while keeping you outside the reach of that weapon, which is the exact approach the Nameless Captive will demand next.
The Nameless Captive
Mandatory, and the hardest fight in Fainweald by a wide margin.
Detail | Value |
|---|---|
Closest beacon | Executioner's Pulpit |
Area | Pit past Ruk, after Tishina's Confessor |
Reward | Executioner Blade Shard, Tarstone |
A dead soldier with a greatsword lodged through his skull, swinging in wide arcs that cover 180 degrees and disrupt standard parry timing. Almost nothing he does is unblockable, with the exception of a kick that appears more often in the second half. There is even an achievement for parrying his full rotating sequence without a miss.
Two tools change the fight. Grisha summoned from the Remnant, run as a passive for more frequent procs, interrupt his swings mid-animation. A thrown Battle Axe via the Infused Stone creates distance when his reach becomes a problem. Stone Stun timed just before his sweeping chain ends knocks him down for an extended damage phase.
Pale Grisha
The last Grisha in Fainweald, hidden behind a genuinely obscure route.
Detail | Value |
|---|---|
Closest beacon | One Legged Wolf |
Area | Grisha Hunting Ground, a hidden dungeon |
Reward | Grisha Remnant |
From the beacon, turn left onto the cliff path behind you and avoid the hulking swordsman. Veer right into the area with white mushrooms and giant bells, then turn left immediately onto a side road leading to a wet clearing. Kill the cultists there, turn right, and keep going to the dungeon entrance. The Pale Grisha hits harder and holds more health than its cousins but fights identically, so equipping Grisha Remnants and setting your own Grisha on it shortens the whole thing.
Ruins of Mammon Bosses
Twenty encounters wait in Mammon, including two of the six Corrupted Gates, two Shells, and the game's most dangerous optional detour. Difficulty stops scaling gently here.
Bor the Deluded Monarch
A crowned head with legs, and a fight with a mob phase attached.
Detail | Value |
|---|---|
Closest beacon | Abbey Entrance |
Area | Kingdom of Fools, unlocked by cleansing the beacon |
Reward | Gloom, Tarstone |
Bor gnaws and kicks, and his jump is the one attack worth saving a parry for. Heavy attacks land freely between his lunges. Halfway through the fight a mass of smaller enemies joins in, which is where the Lute turns his own court against him. Nothing here demands more than patience.
Twin Sesters
Two bosses in sequence, and the fight that hands over the Black Needle.
Detail | Value |
|---|---|
Closest beacon | Sester's Gate |
Area | Sester's Bastion, entered by cleansing the beacon |
Reward | Black Needle |
Kill the crossbow-wielding sester first so you are not dodging bolts while managing the other. The one in red parries your attacks and hits hard with a rapier, so watch her stance rather than swinging on cooldown. After both fall, a third emerges carrying the Black Needle spear and the title changes to Stray Sesters. She is no harder than the pair, and her weapon becomes yours.
Sester Secundus
A secret boss tied to unlocking Genessa.
Detail | Value |
|---|---|
Closest beacon | Sester's Gate |
Area | Revenant Graves, beneath the Sester's Refuge |
Reward | Sester's Censer, Genessa Shell |
Drop down into the area of red trees and head toward the northern wall, where a ghostly censer sits against the cliff. Interacting teleports you into the fight. She uses a long spear and lightning projectiles, giving her real reach, but she staggers under heavy combos and folds quickly once cornered. Aggression beats spacing here.
Caged Grisha
A Grisha in the snow zone, with a double reward.
Detail | Value |
|---|---|
Closest beacon | Winterglass Lake |
Area | Valley of the Revered, after cleansing the beacon |
Reward | Grisha Remnant, Fusillade Stone |
Nothing about its moveset differs from the others despite the mask and the setting. Beware the unblockable arm-blade thrusts, corner it against the arena wall, and knock it down repeatedly. The Fusillade Stone alongside the Remnant makes this one of the better value fights in Mammon.
Urrig, the Executioner

A slow hammer boss with a long, readable, entirely unblockable combo.
Detail | Value |
|---|---|
Closest beacon | Winterglass Lake |
Area | Arena at the end of the path across the frozen lake |
Reward | Warden's Stone |
Cross the lake by shooting a distant bell with your sidearm, which raises platforms. The route beyond is linear, with Skulks that explode into ice and Grisha Hunters along the way. Urrig telegraphs everything but blocks nothing: one unblockable strike, a pause while his body keeps rotating, two more unblockable strikes, then a final one that ices the ground where it lands. Circle him through the rotation and hack away with a fast weapon rather than trading heavies.
Tyrant's Sychophants
A skeleton mob standing between you and the region's gate boss.
Detail | Value |
|---|---|
Closest beacon | Ovate's Chamber |
Area | Pilfered Crypt, unlocked by cleansing the beacon |
Reward | Gloom |
They rise after you clear the Grisha Hunters in the area. Individually they are nothing. The Lute works, though heavy attacks clear them nearly as fast. The only real threat is being cornered while three of them swing at once, so keep circling the arena rather than holding ground.
Droeg, the Conquerer
Mandatory, and a frost fight that gets harder in its second half rather than easier.
Detail | Value |
|---|---|
Closest beacon | Ovate's Chamber |
Area | Through the Bone Gate past Ruk, Valley of the Revered |
Reward | Frost Core, Tarstone, Gloom |
Droeg is a reassembled ancient ruler with a bone club and heavy Frost buildup on every connect. Counterintuitively, staying close is safer. When he kneels, parry the back-and-forth swings or dodge sideways, since the Harbinger's invincibility frames can carry you through them entirely. Watch for the foot stomp and the unblockable club slam, and note that his recovery after an overhead leaves his back fully exposed.
Land a riposte and he starts throwing flaming balls of ice across the arena, which kill more players than the club does. Track their arcs, dodge on the descent, and never stand still, because he repeats them for the rest of the fight. Frost protection matters enough to plan around: equip Martyr's Ash as your active and trigger it the moment phase two begins.
Viletongue Batushka
A miniboss whose difficulty comes entirely from the room rather than the enemy.
Detail | Value |
|---|---|
Closest beacon | Castigator's Keep |
Area | Viletongue's Domain, unlocked by cleansing the beacon |
Reward | Ovum access |
Proceed through the dungeon to a room holding a gated Ovum and a Strange Concoction. Drinking it starts the fight and reverses every direction you press, with psychedelic effects layered on top. Viletongue himself is one of the elongated-tongue monks you have already killed a dozen of. Harden with Vatra's Seal while you adjust to the inverted controls, then fight him normally once your hands catch up.
Vellen, High Lord of Mammon
A story-heavy boss who fights like a footnote, and the gate to Lazlo.
Detail | Value |
|---|---|
Closest beacon | High Lord's Courtyard |
Area | Royal Crypt of Mammon |
Reward | Lazlo Shell, Tarstone |
Climb the stairs to the air current, ride up, dodge the rolling Knight of Mammon, then take the stairs to your right into the crypt. A second Knight rolls down the narrow passage before you reach him. Vellen has a scythe with considerable range and very little else, so a sustained barrage of heavy attacks ends it. Most players arrive late enough that he barely slows them down.
Prophet of Profane Infinities
An optional miniboss holding one of the eight melee weapons.
Detail | Value |
|---|---|
Closest beacon | Abandoned Outpost |
Area | Obsidianite Mines, at the lowest level of the Deserted Slums |
Reward | Obsidian Hammer, Tarstone |
Head south from the beacon through the ruined town toward the Gate of Mammon, watching for Tarblighted Miners, then descend to the level where obsidian slabs jut out of the puddles. The mine entrance hides in a small cave. The Prophet is a stronger Faceless Clerik: parry the big swing, avoid the unblockable ground pounds, and punish between them. Reaching him takes longer than killing him.
Subjugated Guardian
Another case where the approach is worse than the boss.
Detail | Value |
|---|---|
Closest beacon | Abandoned Outpost |
Area | Sentry's Grave, inside the Lonesome Spire |
Reward | Ballistazooka |
Take the path north toward the Spire rather than down into the Deserted Slums, and watch the alcoves on the way up for the dungeon entrance. Inside, Subjugated Sentries fire across walkways suspended over lava, and falling costs you everything you were carrying. The Guardian fires flaming bolts from its crossbow head. Clear the flanking enemies via the stairs, then close in and stay glued to it, which limits it to head slams you can parry.
Infested Miner
A miniboss fight that hands you a room full of ammunition.
Detail | Value |
|---|---|
Closest beacon | Gate of Mammon |
Area | Burrowkin Dwelling, unlocked by cleansing the beacon |
Reward | Miner's Double Pick, Tarstone |
He fights with dual pickaxes and makes rocks rain from the ceiling, in a room already full of Lithopods. That last detail is the answer rather than the problem: confuse the Lithopods with the Lute and they turn their claws on him while you stay out of the falling debris.
Strange Grisha
The last Grisha on the roster, slightly off the main route.
Detail | Value |
|---|---|
Closest beacon | Gate of Mammon |
Area | Withered Shoals, near Ossinite Falls |
Reward | Grisha Remnant |
Enter the Corrupted Gate behind the beacon, run the passage to a wooden structure with a stairway, go down, turn left into Withered Shoals, and pass the skeletal ribcages. Turn right at the Grisha Hunters to reach a Bone Gate that teleports you into the arena. Check around the falls rather than following the main path through the gate. It looks more alien than its kin and fights exactly like them.
Hexapod
Mandatory, the final regional gate, and Proxima's entire storyline in one encounter.
Detail | Value |
|---|---|
Closest beacon | Nameless Pass |
Area | Withered Shoals, up the path past Ruk |
Reward | Brood Pearl, Tarstone, Gloom |
The Hexapod attacks with relentless scythe strikes while spawning brood adds across the arena floor. Wide-cleaving weapon skills clear the adds in one motion, which is the difference between managing the fight and drowning in it.
The Triarch Repeater is the intended answer, and Proxima's memories show her using exactly that. Pair it with the Marksman's Stone or the Deadeye Stone for critical chance or critical damage, then add the Rupturing Stone so critical shots deal Break damage. A sustained stream eventually forces a riposte. In the final phase it speeds up, dives into the arena water, and rushes you, so create distance to keep firing and switch to melee when it closes. Its unblockable grab is the one attack that ends attempts outright.
Starved Harridan
A fast optional boss guarding the entrance to the Vestige of Infinity.
Detail | Value |
|---|---|
Closest beacon | Castigator's Keep |
Area | Arena above the lift into the Vestige of Infinity |
Reward | Gloom |
Take the stairs down into the keep courtyard, head north past the two exploding enemies, emerge in a Grisha Hunter camp, veer left up the stairs, cross the candlelit corridor, and pull the lever for the lift. She waits above it. Her unblockable scream knocks you off your feet, though strafing around it opens her back for several hits. Dodge the talon projectiles and avoid spending any time in your Shell-less form, since two or three of her strikes will kill it. If she proves too fast, send the lift down, kite her toward the edge, and knock her off.
Sariel, the Endless
A two-part Shell fight that gives up a Shell, a weapon, and a sidearm.
Detail | Value |
|---|---|
Closest beacon | The Silent Steps |
Area | Brutalist structure, then the Chamber of Becoming |
Reward | Sariel Shell, Clockwork Scythe, Caged Hystrix |
Take the Bone Gate to the structure and walk to its central extension, where he charges you with the Clockwork Scythe. The arena has open edges, and knocking him off ends round one in seconds. Explore the stairs behind the massive statue afterwards to find the Chamber of Becoming, guarded at the door by a Knight of Mammon.
Inside he vanishes after taking damage and reappears in a room with a sigil ringed by four stones. Those stones are the fight. Until all four break, he resurrects the instant his health empties, and the encounter loops with no opening to finish it. Destroy them first and everything after is straightforward.
Gloombound Wraith
A miniboss built on the same gimmick as Sariel, in a library.
Detail | Value |
|---|---|
Closest beacon | Gate of Infinity |
Area | Forbidden Archives, unlocked by cleansing the beacon |
Reward | Archive Tome Page, Tarstone |
Progress through the bookshelf-lined dungeon, find the Grimorium Obscurum on top of the stacks, and place it on the altar to open the room holding the Ovum. The Wraith fights like the smaller ones until it surrounds itself with floating books and becomes immune to everything. Two books pulsing with red energy sit on either side of the arena. Break both and it becomes hittable again.
Solnir, the Gloom Seeker
A named elite on the linear route to Sir Isaac.
Detail | Value |
|---|---|
Closest beacon | Citadel Annex |
Area | Ashen Sanctum |
Reward | Gloom |
Several enemies along this stretch are made invincible by blue flames, and Solnir is one of them. Destroy his flame first, which takes about two solid slashes, and he collapses into an ordinary Gloom Seeker afterwards. Attacking him before the flame is out wastes stamina and gives him free hits.
Servants of the Scholar-Prince
The mob gate immediately before the region's hardest fight.
Detail | Value |
|---|---|
Closest beacon | Citadel Atrium |
Area | Servant's Hall, triggered by cleansing the beacon |
Reward | Gloom |
Same rules as Solnir, scaled up: break the blue flames, then Lute the survivors into fighting each other. Two flames exist here, and the second hides behind the pillar at the centre of the arena, which is where most attempts stall. Watch for the rolling Knights of Mammon, since they cut through whatever chaos you have arranged.
Sir Isaac, the Scholar-Prince
Mandatory, two-phase, and the fight most players lose the most attempts to.
Detail | Value |
|---|---|
Closest beacon | Citadel Atrium |
Area | Up the stairs past Ruk, Faded Citadel |
Reward | Mutation Essence, Tarstone, Gloom |
Phase one gives him a shield that absorbs damage and blocks ranged shots outright, so put the sidearm away and strafe for the unshielded side. After a third of his health he discards it and fights with four blades, launching into the air and stabbing repeatedly into the ground. One or two connections in this form will kill you.
His only unblockable is a grab that drains almost your entire health pool. Everything else parries, but learning the moveset takes time. A Proxima Lightning build applies stacks through the Biosampler while you work on the shield, and a thrown Battle Axe via the Infused Stone keeps you clear of the blade barrage afterwards.
The Unfound Path Bosses
Depositing all six Ova opens the final dungeon beneath Marrow Keep, a multi-layered zone of branching paths. Three tendril bosses can be cleared in any order, and killing all three destroys the seals around the central platform.
The Monolith
The most complained-about fight in the game, and the one that has already been patched twice.
Detail | Value |
|---|---|
Closest beacon | Obsidian Vault |
Area | Just beyond the beacon, on the Brether's Court path |
Reward | Tendril cleared |
It slams its mass into the ground with tracking that follows you through a dodge, though those slams can be parried or hardened, and hardening buys the better window. After a riposte it switches to a rolling attack and fires lasers that either track directly or sweep in arcs. Dodge into the arcs to pass through them, then push toward its back where the beams do not reach. The third phase adds spinning, an unblockable drop from above, and a spiral of accelerating arcs.
Malborn Offspring
A demanding two-phase duel where staggering matters more than damage.
Detail | Value |
|---|---|
Closest beacon | Faithful's Shelter |
Area | Arena up the slope, across the corrupted bridge |
Reward | Tendril cleared |
Phase one runs on a three-slash combo where the first two hits parry and the third does not, plus an unblockable sequence where he throws his sword, teleports to you, and finishes with a jump slash. Phase two repeats it with Lightning damage and a grab with alarming tracking.
Disruption beats trading here. The Axatana with the Duality Stone keeps pressure on, Genessa's summons overwhelm him when they connect, and Proxima's Lightning mitigation covers phase two. A stack of Grisha Remnants run as a passive is the most reliable answer, since it stops him finishing a string at all.
Orrem, the Discarded Golem
The easiest of the final four, and a callback to the prologue.
Detail | Value |
|---|---|
Closest beacon | Bridge of Procession |
Area | Directly across from the beacon |
Reward | Tendril cleared |
Phase one mirrors the Tar Golem: axe swings that hit hard but read clearly, ideal for Perfect Guards and Break damage leading into ripostes. Avoid the unblockable jumping attack and the move where he slams both axes together. In phase two he grows a tail, becomes Orrem the Reclaimed, and gets fast enough that parrying stops being reliable. Stasis stacks slow him usefully. He is also a large target who barely moves, which makes summons unusually effective.
Zmey, the Unbidden
The final boss, and a fight decided by one status effect.
Detail | Value |
|---|---|
Closest beacon | Hidden Nave |
Area | Up the air current behind the beacon |
Reward | Campaign completion |
Zmey is a colossal draconic entity with an unblockable tail thrust that reaches across the arena and leaves you open to a follow-up slam heavy enough to knock you out of your Shell. Staying underneath him and attacking from below is safer than any spacing you can hold at range, timing parries around his stamping. When he leaps back and raises an arm, dodge immediately, because the thrown blade is coming.
Later he breathes fire, and after a riposte he releases waves of AoE flame that must be dashed through. Getting caught inflicts Cosmic Disease, which locks you out of your Shell, your skills, and your Tarstones. The Seedbearer's Scripture clears it and knocks him over on use, doubling as your best damage window. Getting it means finding all three special Glands and presenting them to the Old Prisoner in the Forgotten Tower during Night Mode.
Finishing the Roster
Most of the 47 are optional, and skipping them costs more than it saves. Three Shells, one melee weapon, one sidearm, and seven of the eight Grisha Remnants sit behind fights nothing in the campaign requires. Clear each region's dungeons before triggering the next beacon phase, since two encounters on this list disappear permanently once the world state moves on. Dying repeatedly is part of the process here, and every failed attempt hands you telegraph timings you did not have before.


 Successfully copied... Thank you for sharing our content!:



5% deposit bonus up to 100 gems

a free Gift Case





EGAMERSW - get 11% Deposit Bonus + Bonus Wheel free spin


EXTRA 10% DEPOSIT BONUS + free 2 spins

3 Free Cases + 100% up to 100 Coins on First Deposit


5 Free Cases, Daily FREE & Welcome Bonuses up to 35%

3 free cases and a 5% bonus added to all cash deposits.

+5% to deposit




Comments